# Planning and Development
Workflow
Before you start building for the competition, you need a repeatable way to go from "here is what the application should do" to "here is a working feature."
Today you will practice breaking down requirements, visualizing how an application works in Excalidraw, planning the interface in Variant, setting up your development environment, using version control, and directing Codex or Claude Code during implementation.
AI can generate substantial parts of your application. Your job is to direct that work, understand the objective, review what changed, run the application, test the result, investigate problems, adapt when requirements change, and decide what happens next.
You are not expected to finish an application today. You are expected to leave with a workflow that you can repeat independently during the WebForge.
## What You Need
Get these ready before the practical portion begins. Ask an instructor if something is not working.
## Think Before You Build
AI can generate code very quickly, but somebody still has to define what the application is actually supposed to do.
Before implementation begins, you should be able to explain the application's users, pages, features, actions, data, and expected behavior.
How to break down a requirement
- Start with the requirement, not the code
- Identify who will use the application
- Identify what the user is trying to accomplish
- Break large requirements into smaller features
- Identify the pages or areas required
- Identify the actions the user can perform
- Identify what information the application needs to store or display
- Identify how different parts of the application connect
- Write down unclear requirements before implementation begins
## Functional Planning with Excalidraw
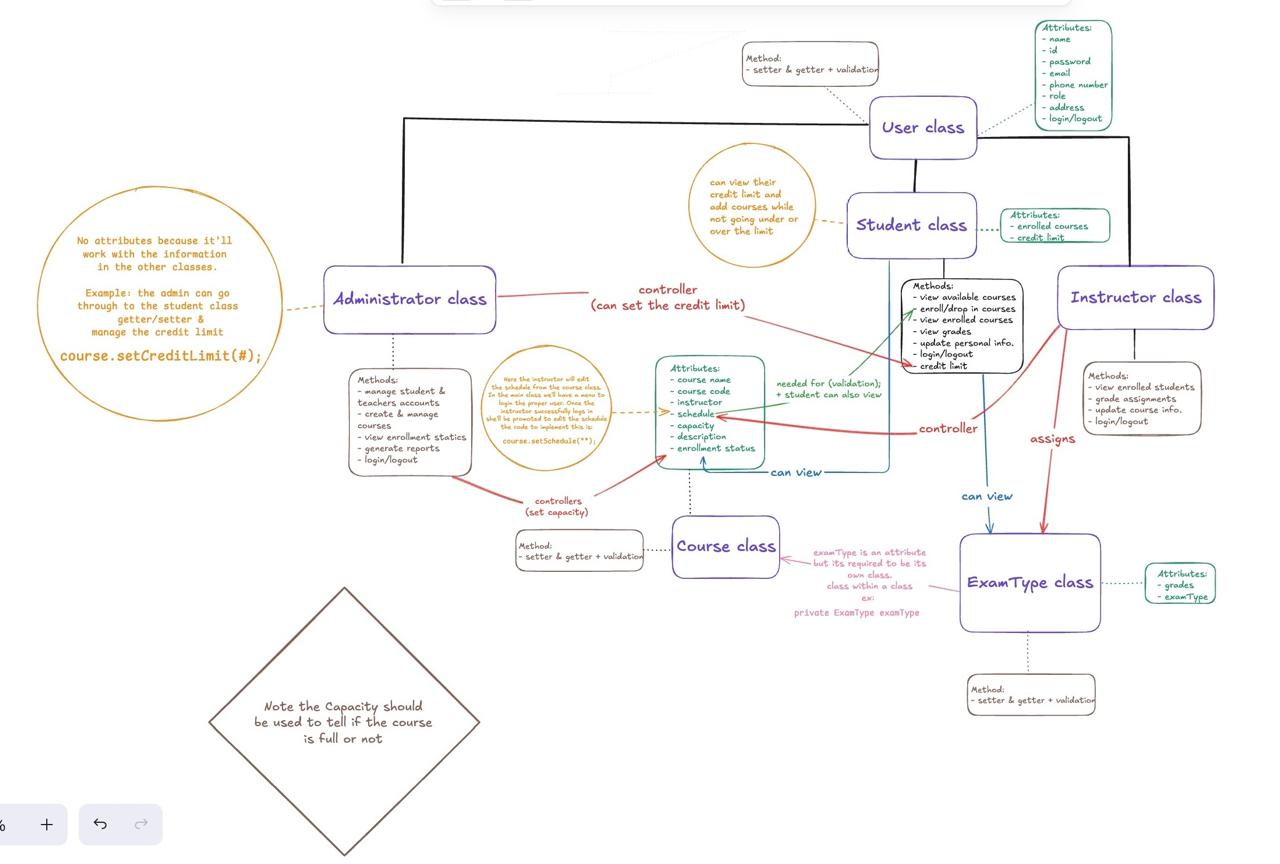
Excalidraw is where you visualize how the application functions. You are not creating a formal enterprise architecture diagram.
Your diagram should help you answer one simple question:
Your diagram should show
- Who the users are
- The major pages or application areas
- The important actions users can take
- Where data is needed
- How major parts of the application interact
- The important user flows
- Only enough detail to make the system understandable
## UI/UX Planning with Variant
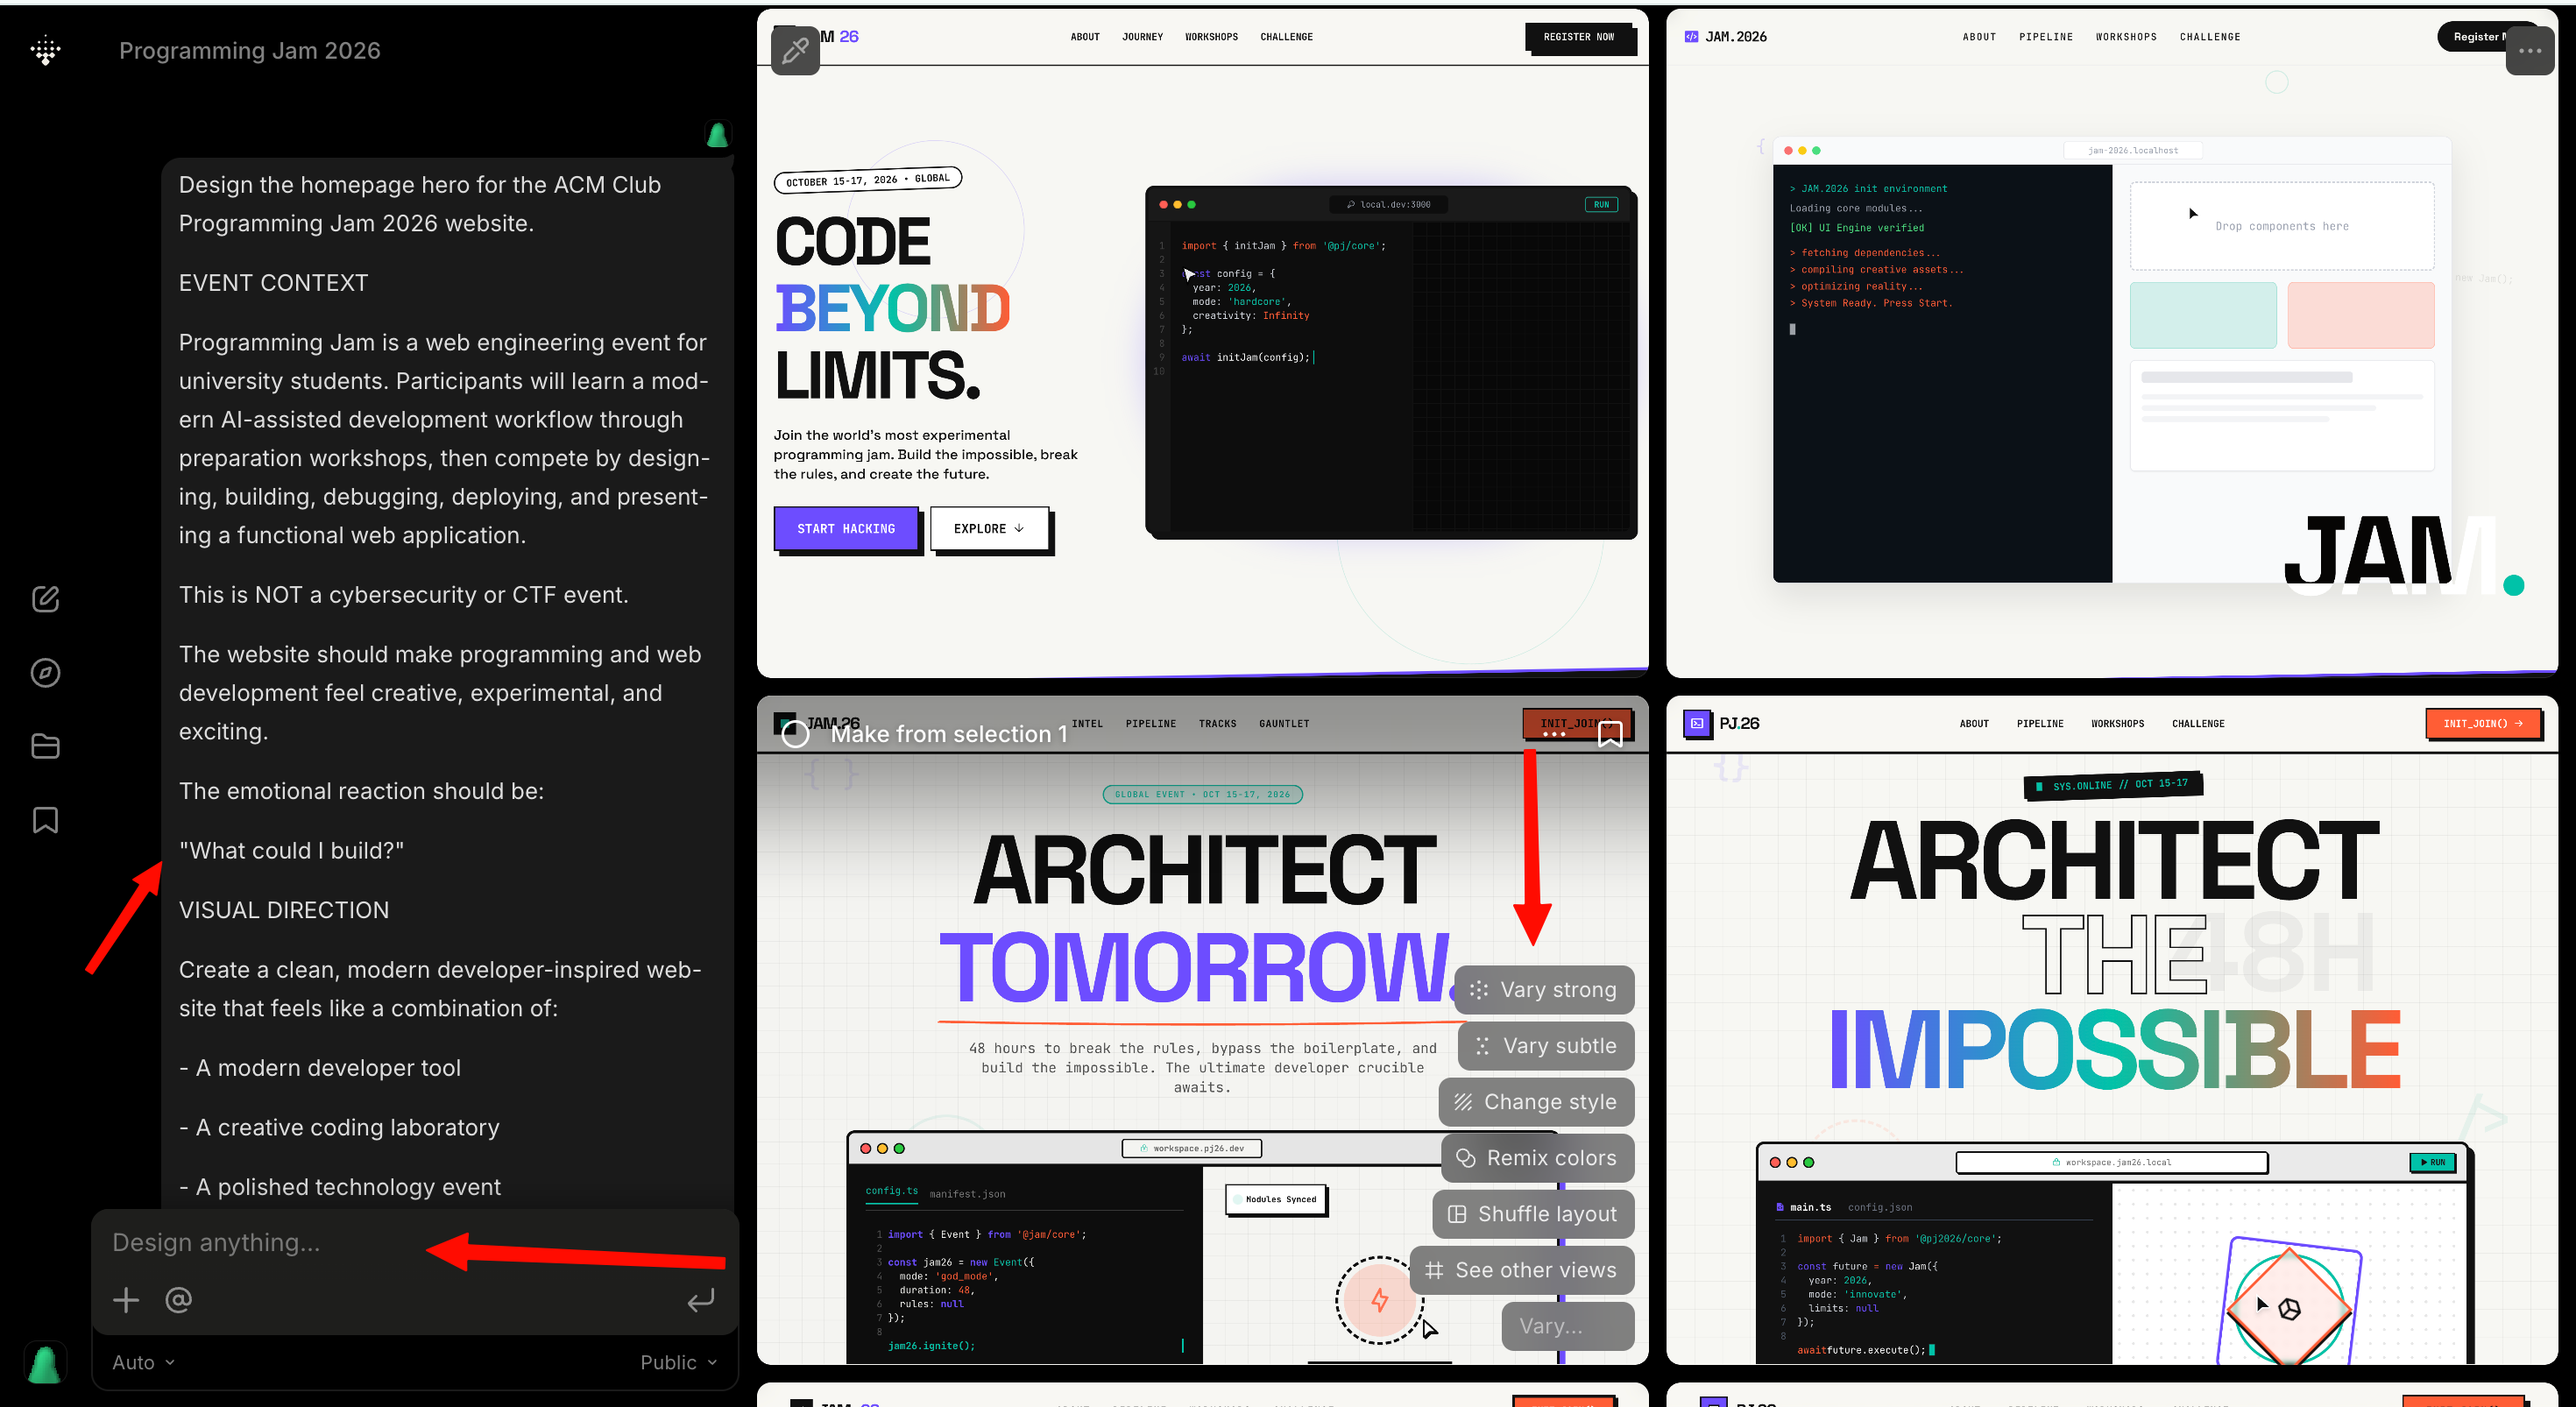
Your Excalidraw diagram describes how the application works. Variant helps you explore how that functionality should be presented to the user.
- Let functionality influence the interface
- Think about navigation and page hierarchy
- Identify the application's most important actions
- Think about forms, buttons, feedback, and empty states
- Treat generated designs as starting points
- Evaluate what Variant creates instead of accepting everything automatically
- Keep visual patterns consistent across the application
Example design prompt
## Your Development Environment
You do not need to memorize commands blindly. Understand what each part of your development environment is responsible for.
- Visual Studio Code is where you open, inspect, and edit your project
- The project folder contains the application's files
- The terminal lets you run commands inside the project
- Node.js provides the JavaScript runtime used by much of the development tooling
- npm manages packages and dependencies used by the project
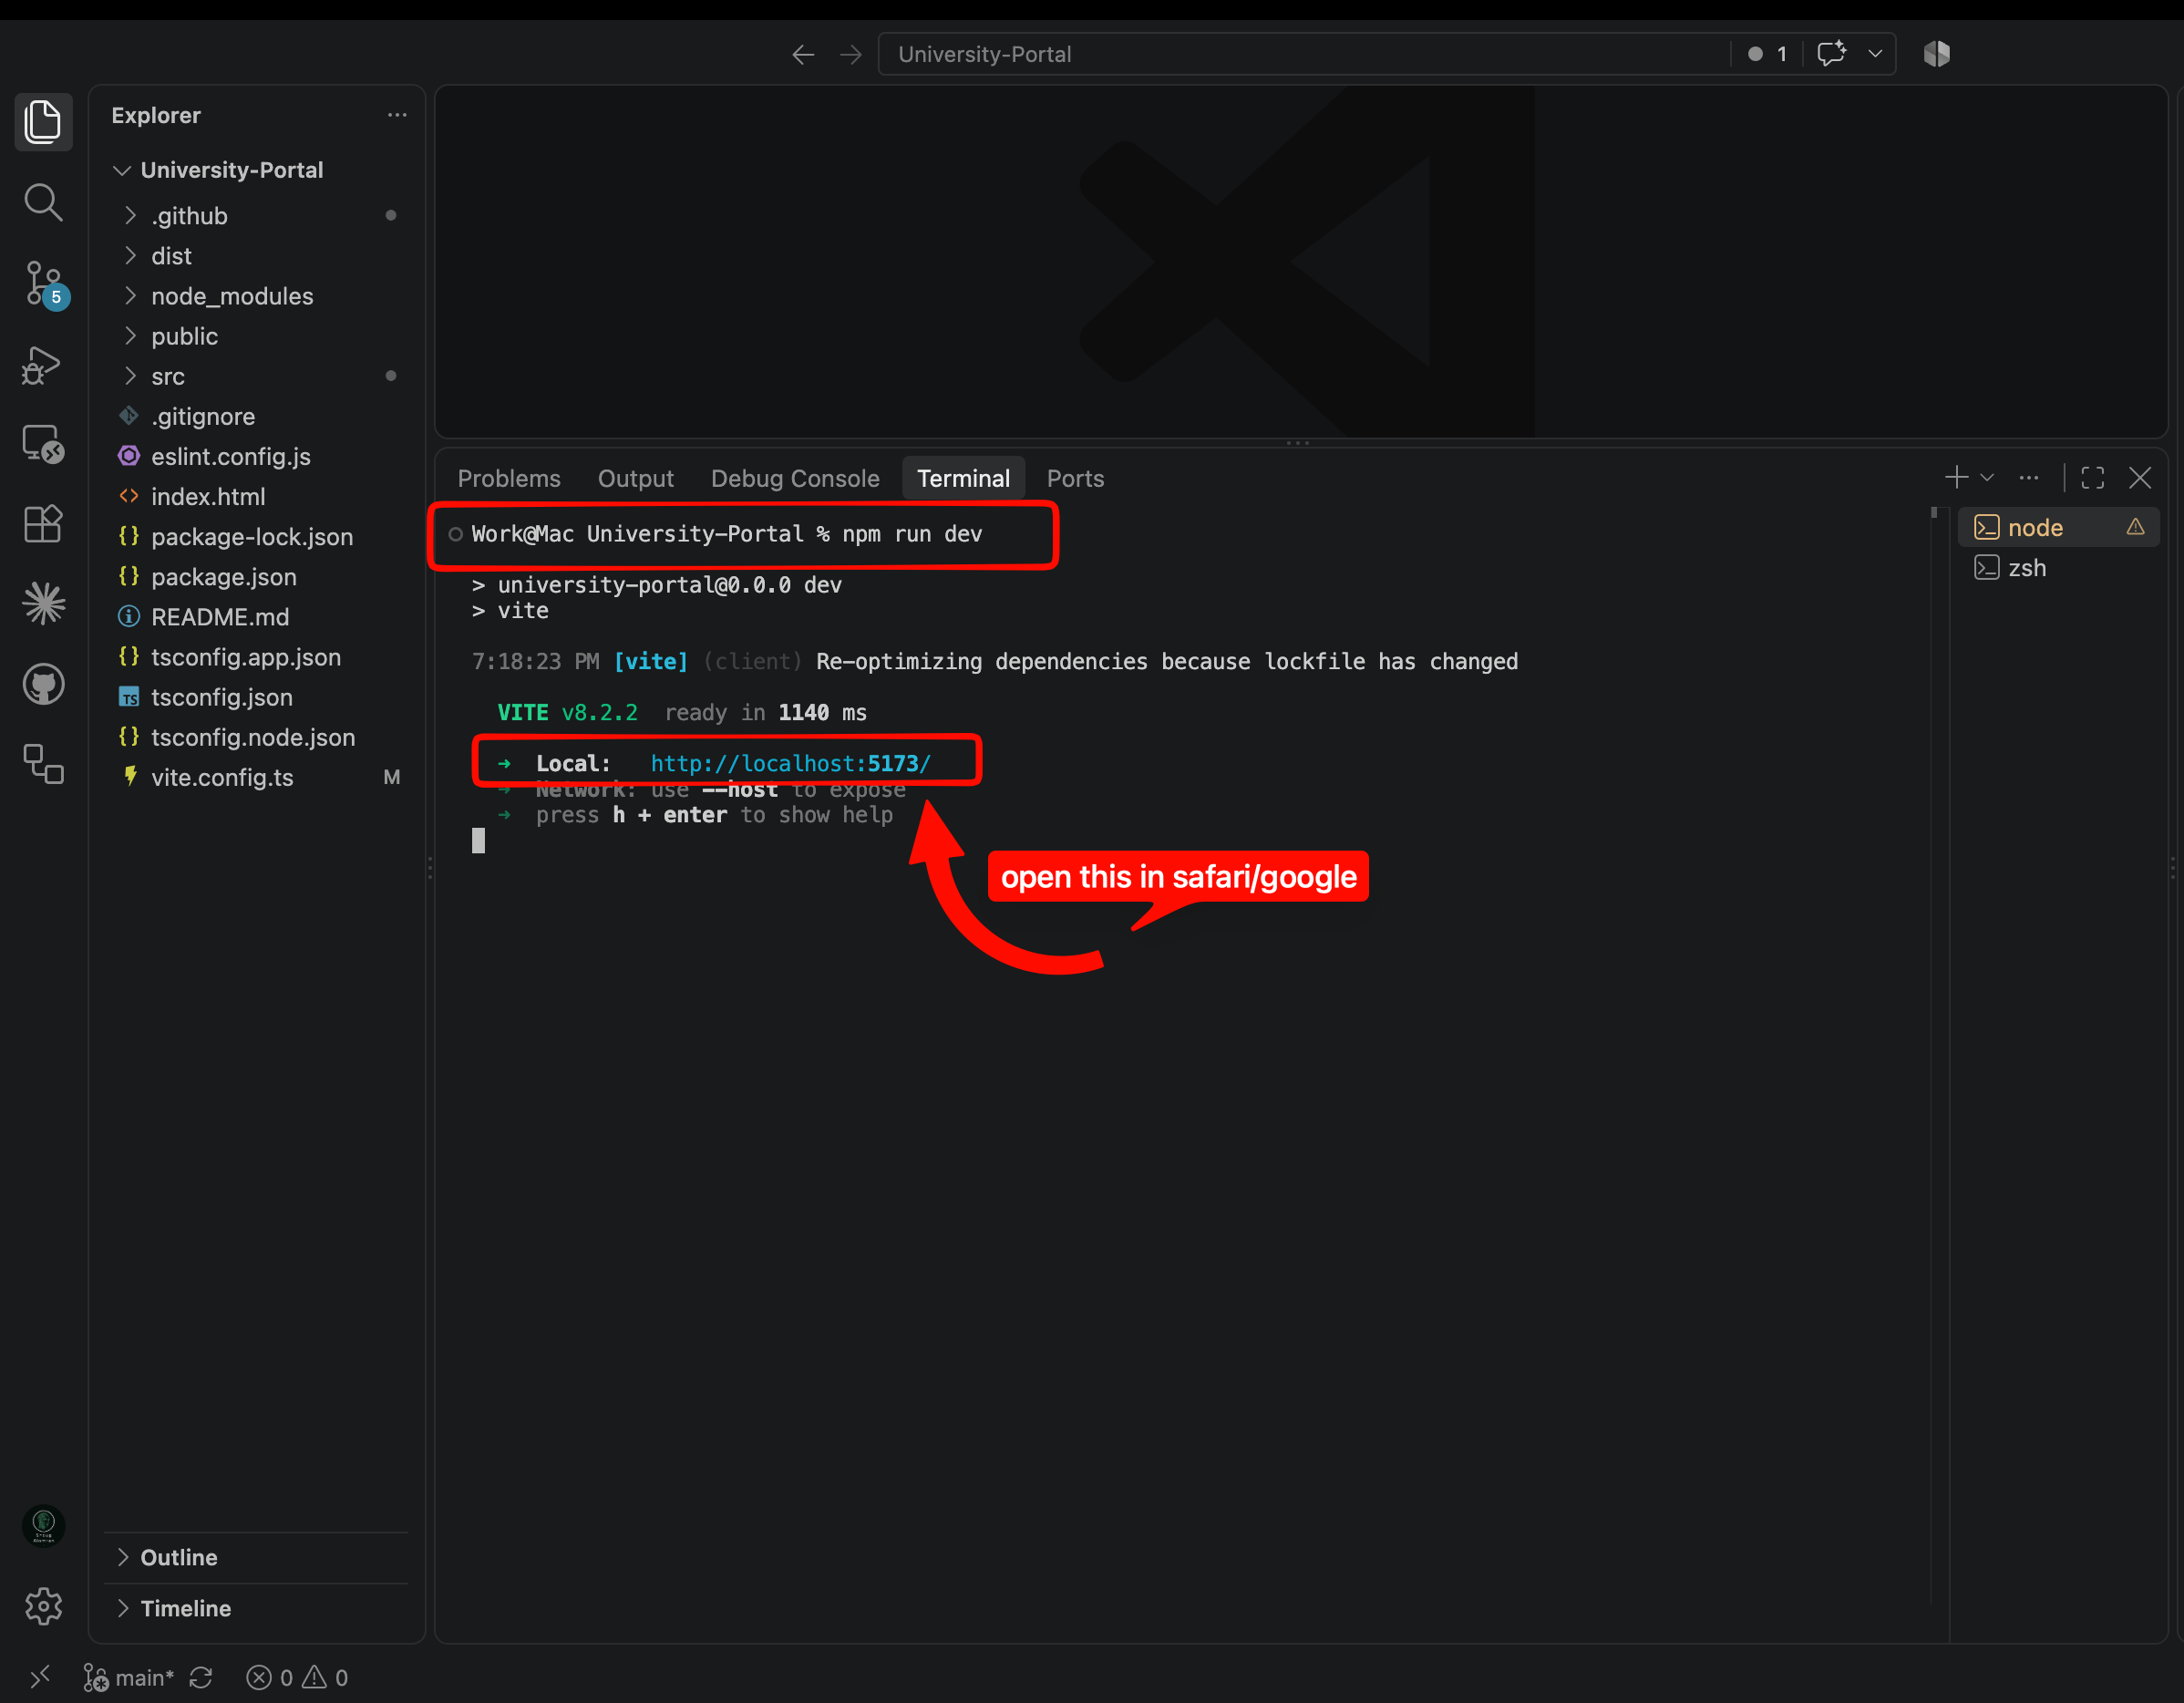
- The development server runs the application locally while you work
- Browser Developer Tools help you inspect errors, network requests, page elements, and application behavior
Two commands you will use constantly
# Install the packages listed by the project
npm install

# Start the local development server
npm run dev
The exact development command can vary between projects. Check package.json or the repository README if npm run dev is not available.
When something breaks
## Version Control with Git & GitHub
Git records the history of your project. GitHub gives that repository a remote home and makes collaboration, backup, and later deployment easier.
- Repository is the version-controlled project
- Commit is a saved checkpoint
- Push sends local commits to GitHub
- Pull brings remote changes to your machine
- Commit meaningful working checkpoints
- Check what changed before committing
- Avoid allowing large amounts of AI-generated code to accumulate without a checkpoint
- Use version history as a safety net when experiments go wrong
Essential Git workflow
# See what has changed
git status

# Stage your current changes
git add .

# Save a meaningful checkpoint
git commit -m "Implement task creation"

# Send your commits to GitHub
git push

# Get the newest remote changes
git pull
## Using Codex & Claude Code as Engineering Assistants
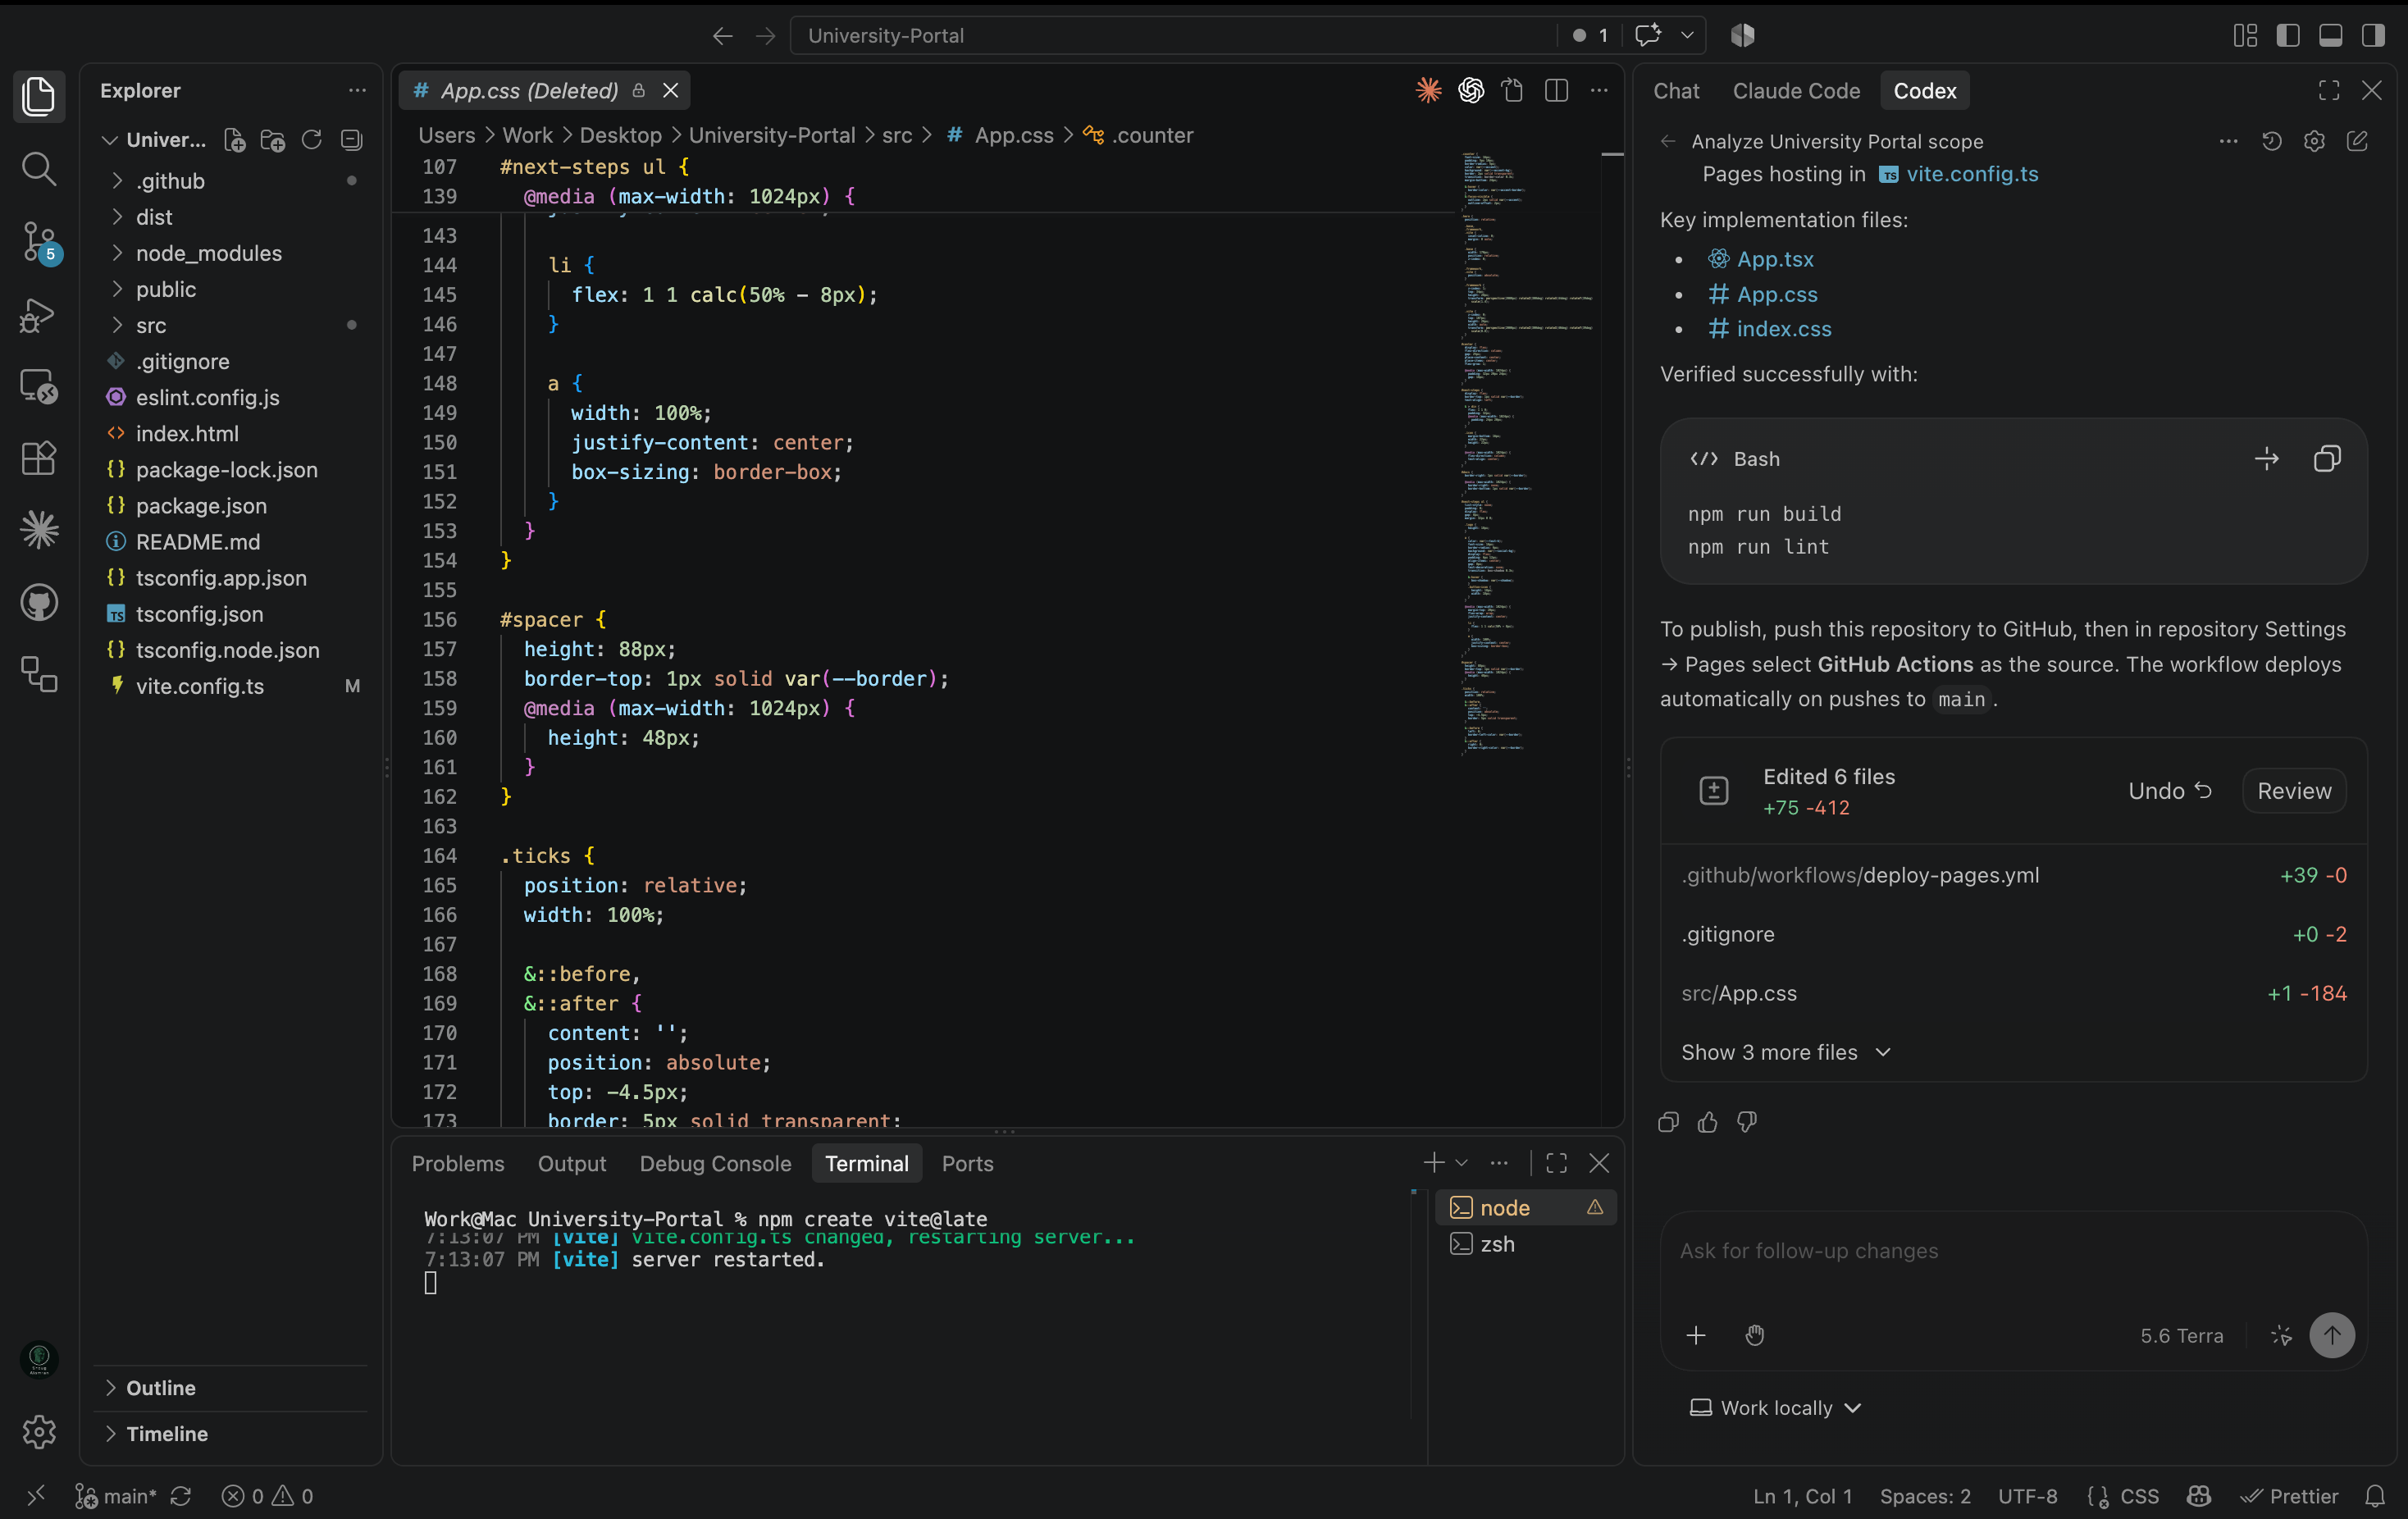
Codex and Claude Code can inspect projects, implement features, modify multiple files, explain code, investigate bugs, run commands, refactor implementations, and assist with testing.
They can write a small amount of code or a very large amount of code. That is not the important distinction.
You remain responsible for defining the objective, directing the work, reviewing the result, testing behavior, debugging problems, and verifying that the application actually satisfies the requirement.
Give AI useful context
- Describe the objective clearly
- Describe the expected behavior
- Include important constraints
- Give it relevant project context
- Ask it to inspect the existing project before making assumptions
- Break uncertain work into smaller steps when useful
- Review the files it changed
- Run the application after significant changes
- Test behavior yourself
- When debugging, provide errors and observations
## Prompt Templates You Can Use
These are starting structures, not magic formulas. Change them to match the problem you are solving.
## Worked Example
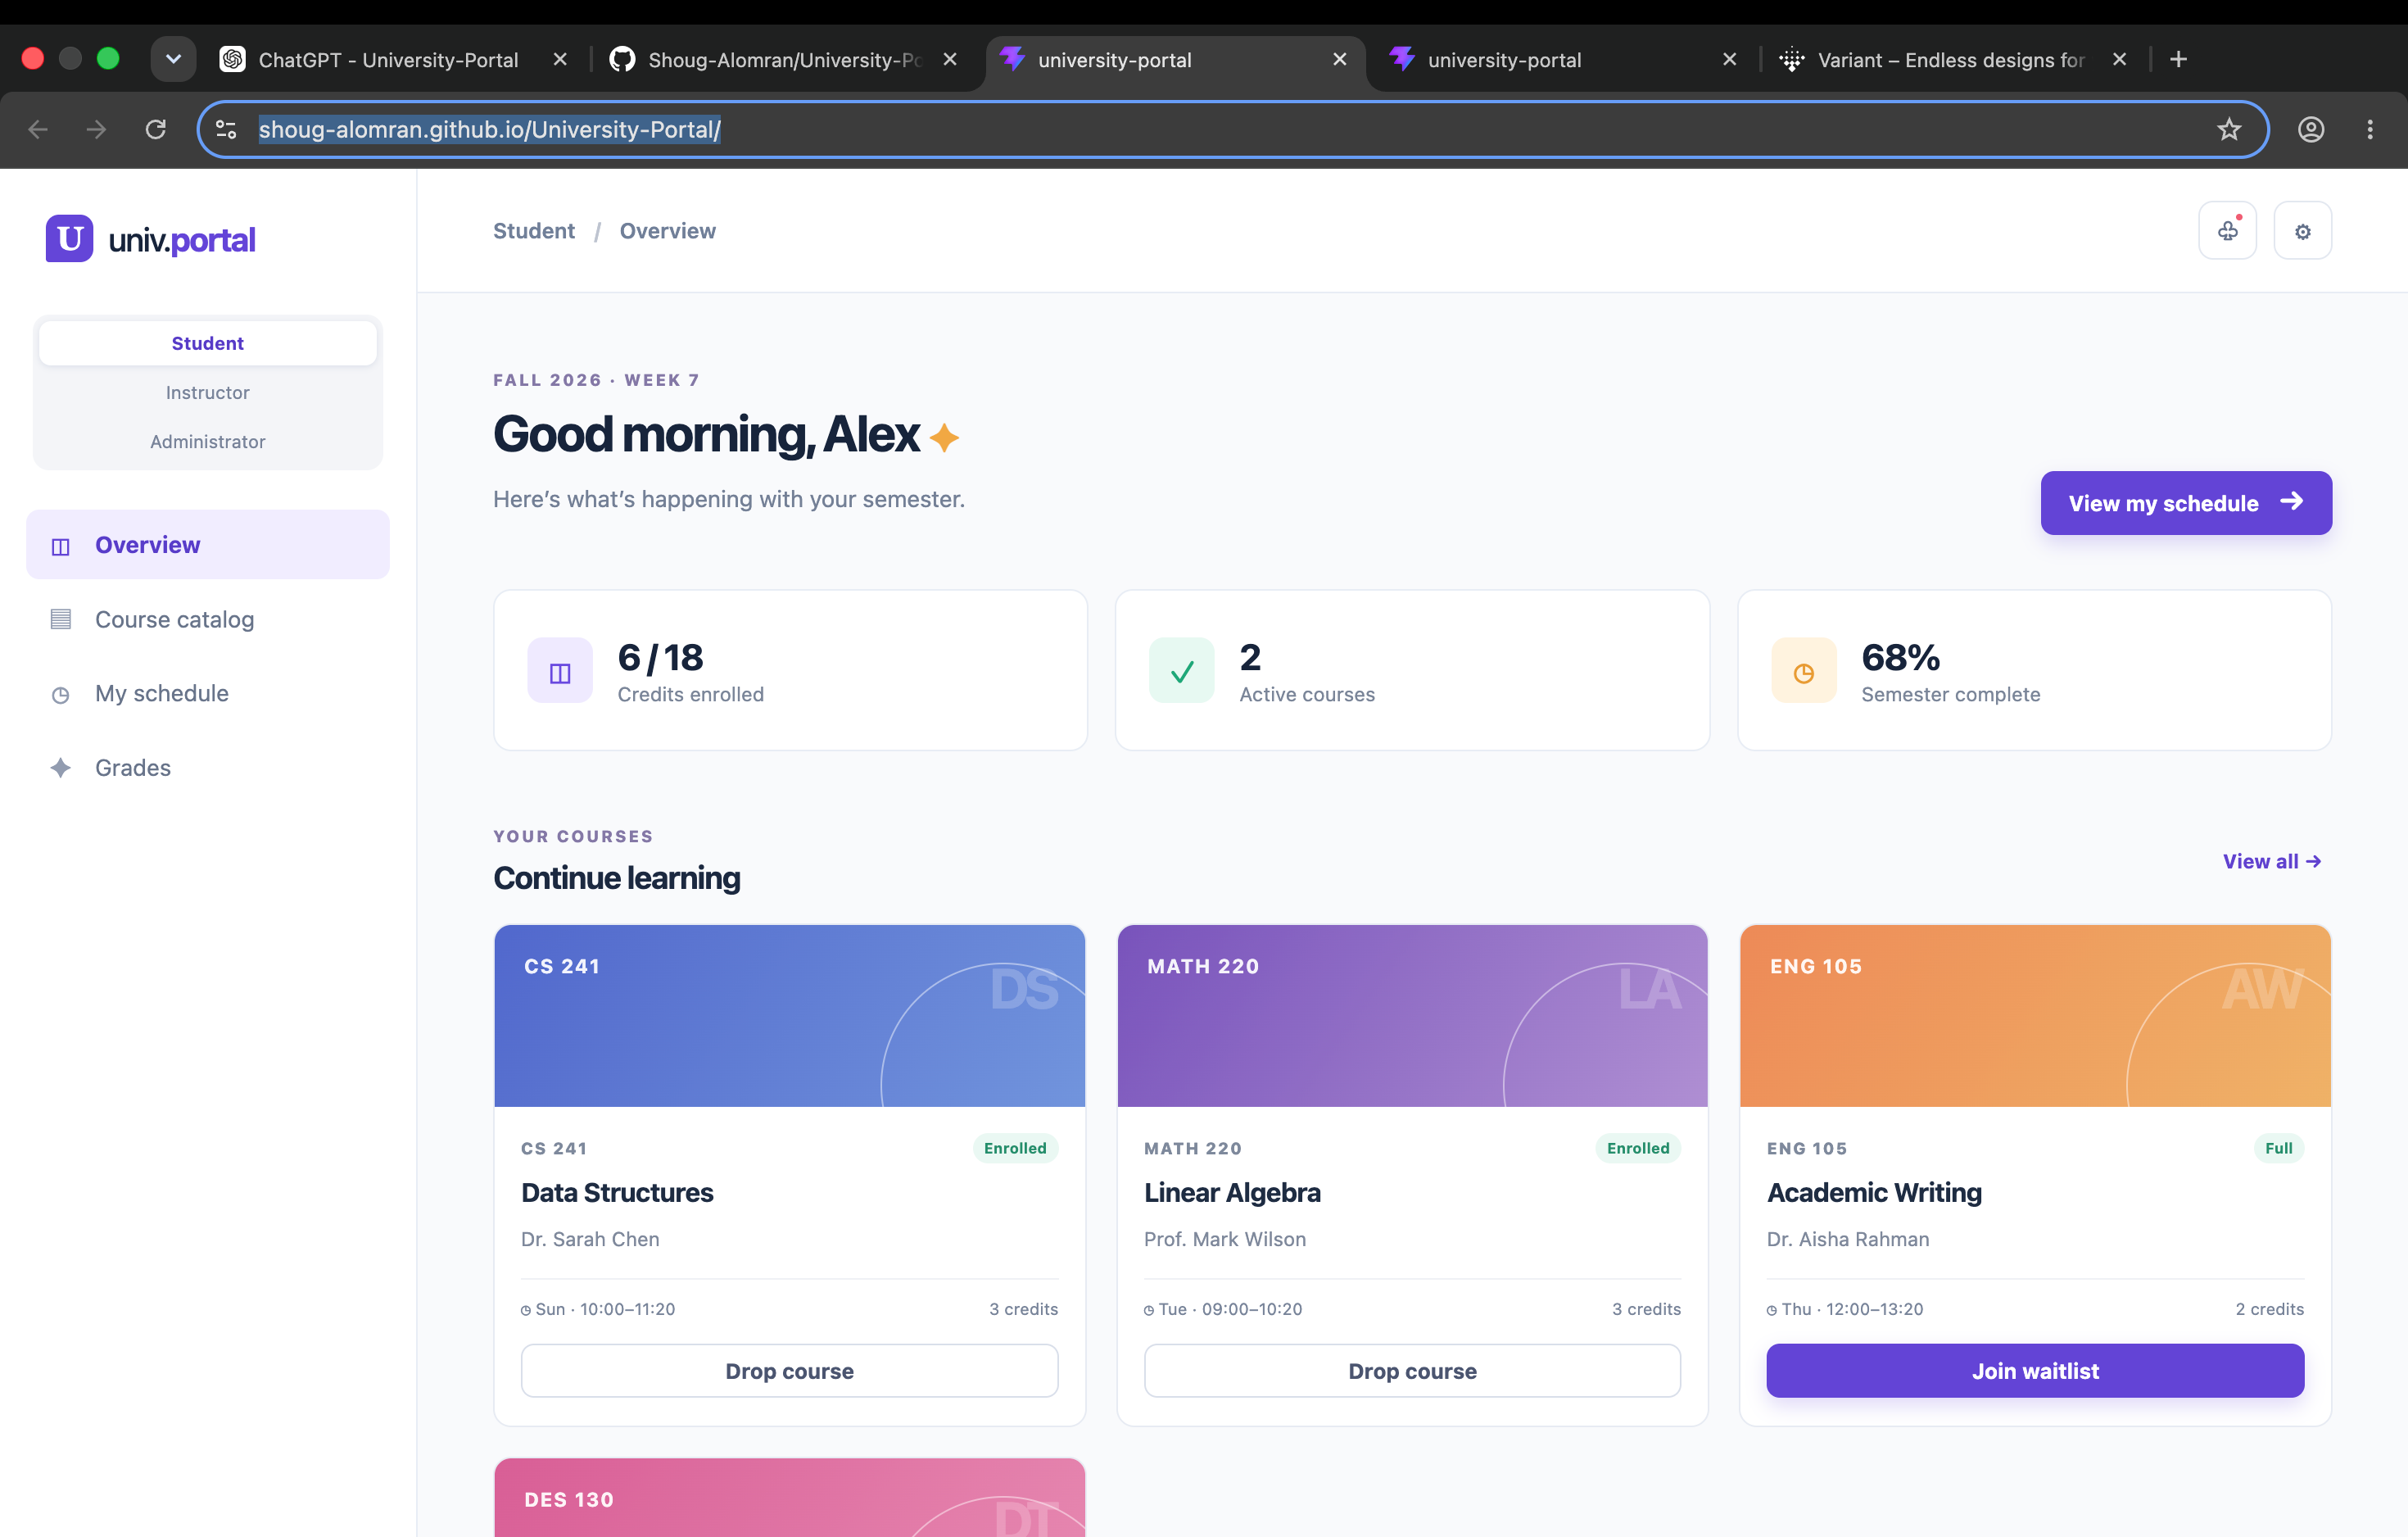
Your instructor will demonstrate the complete workflow using a small application called the University Portal.
University Portal
Build a small web application where students sign up for courses, instructors manage the courses they teach, and administrators oversee the whole system.
Every person signs in as a user, but what they can see and do depends on their role.
- User: shared parent class for every account
- Student
- Instructor
- Administrator
- User: name, ID, password, email, phone number, role, and address
- Student: enrolled courses and credit limit
- All user information uses getters, setters, and validation
- Course: name, code, instructor, schedule, capacity, description, and enrollment status
- ExamType: grades and exam type
- Course and ExamType information uses getters, setters, and validation
- Sign in and out
- Student: view available and enrolled courses, enroll, drop, view grades, and update personal information
- Instructor: view enrolled students, grade assignments, update course info
- Administrator: manage student and instructor accounts, create and manage courses, view enrollment statistics, and generate reports
- Administrator controls student credit limits and course capacity
- Instructor is assigned to courses and controls the course information they are allowed to update
- Instructor assigns grades and exam types
- Student can view course information, exam types, and grades
- Each role sees only what it is allowed to see
- Course capacity and enrollment status determine whether a course is full
- A student cannot enroll past the credit limit
- Focus on the workflow
Before building, ask questions
- What should each role see immediately after signing in?
- What happens when a student tries to enroll in a course that is already at capacity?
- What happens when enrolling would push the student over their credit limit?
- Can a student drop a course at any time?
- Who is allowed to change a course schedule — the instructor, the administrator, or both?
- Should a student see a grade before the instructor has finished entering grades?
- What feedback appears after enrolling, dropping, or grading?
The complete walkthrough
- Read the requirement and identify the user, behavior, pages, actions, and data.
- Use the first AI prompt to identify unclear requirements and implementation decisions.
- Sketch the University Portal in Excalidraw: the roles, what each one can do, and the data behind it.
- Turn the functional plan into an initial interface concept in Variant.
- Open the project in VS Code and explain the project structure.
- Run npm install if dependencies need to be installed.
- Run the application locally with npm run dev.
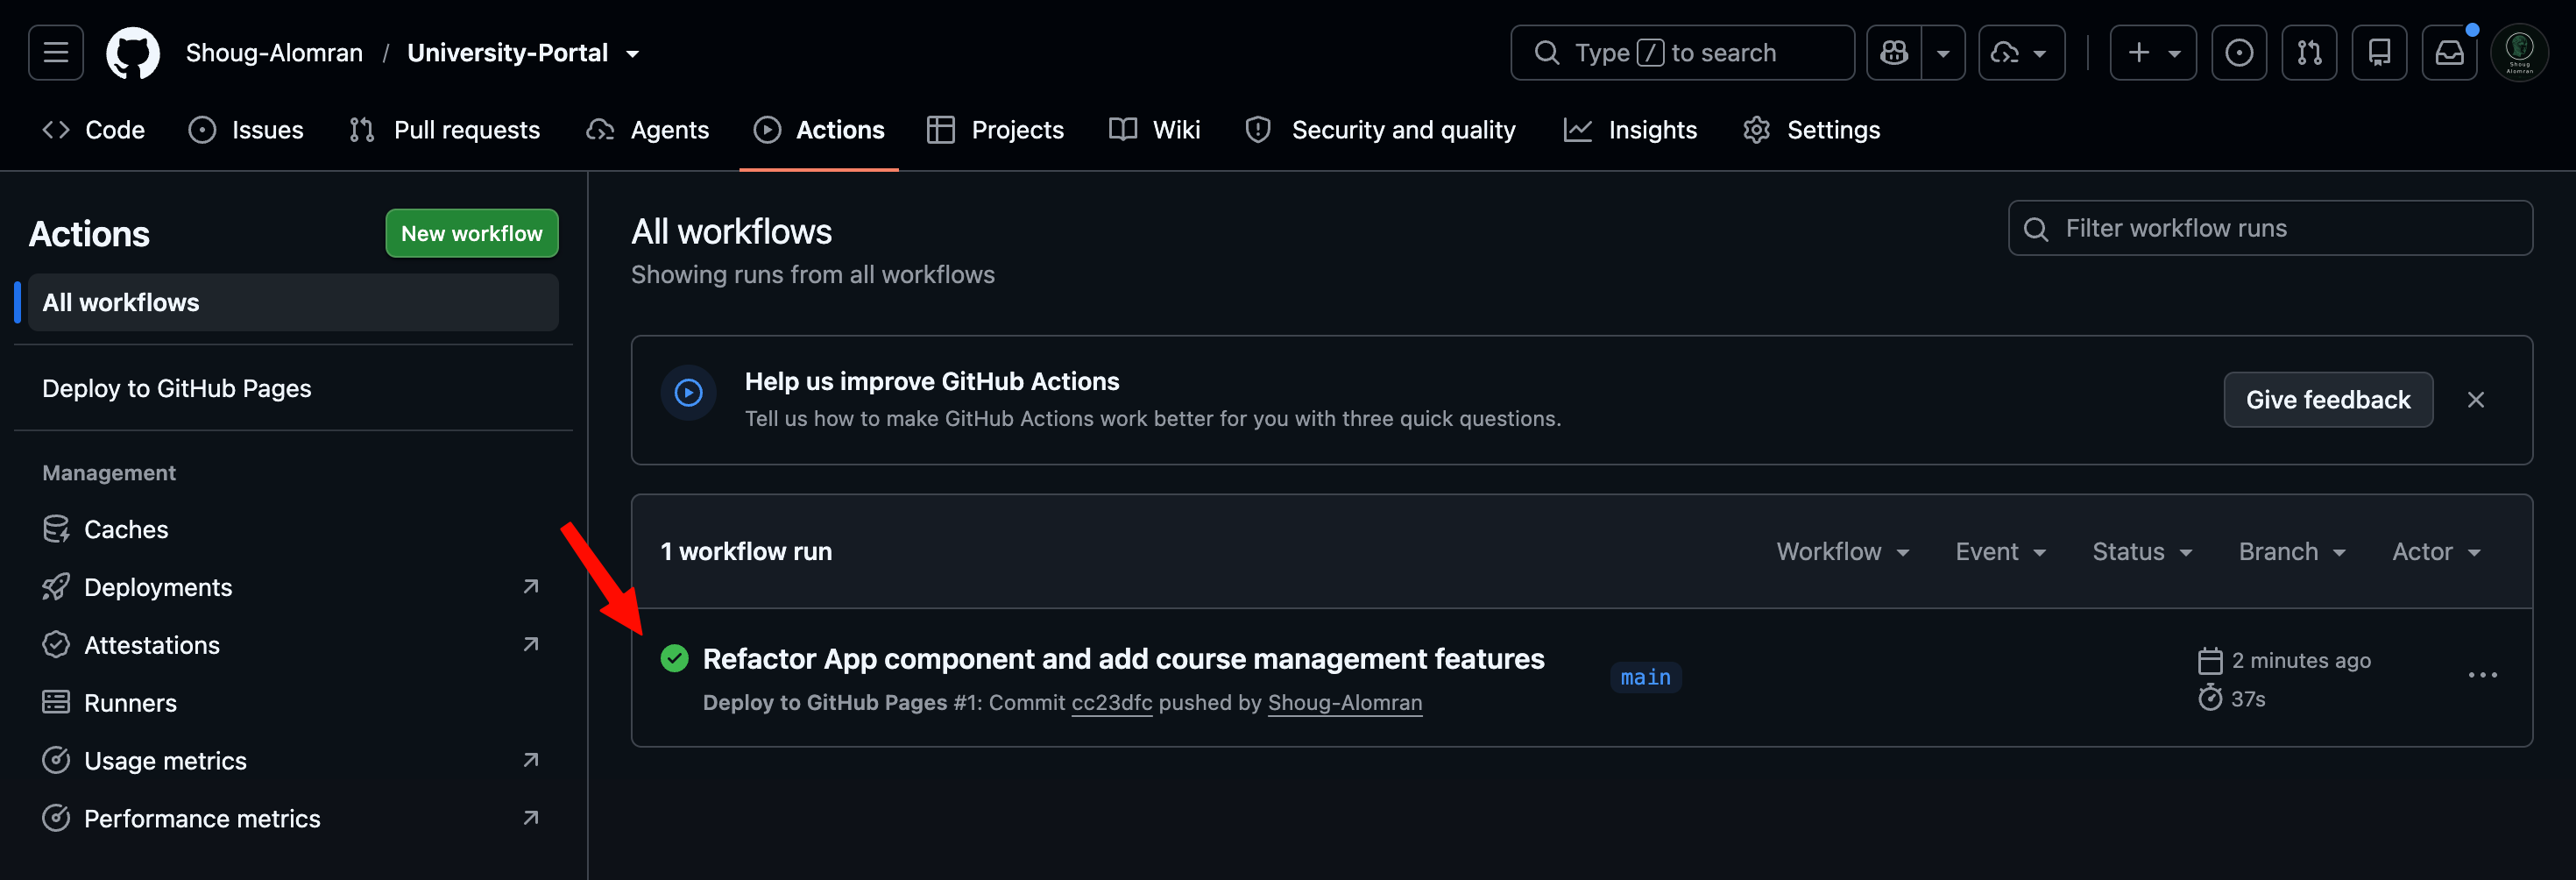
- Create or connect the GitHub repository.
- Create an initial Git checkpoint.
- Give Codex or Claude Code a clearly defined implementation task.
- Review the files and code changed by the assistant.
- Run the application again.
- Test the implemented behavior.
- If something is wrong, collect evidence and investigate the problem.
- Use AI to assist with diagnosis and debugging where useful.
- Verify that the feature now behaves as expected.
- Commit the working implementation to GitHub.
## Your Exercise
Now apply the complete workflow to the University Portal. Use the requirement and Excalidraw diagram below as the authoritative specification. Preserve every class, role, relationship, and constraint shown in the diagram.
University Portal
Build a role-based university portal where students manage course enrollment, instructors manage their assigned courses and grades, and administrators oversee accounts, courses, capacity, credit limits, and enrollment information.
Every person is represented by the shared User class. Their available information and actions depend on whether they are a Student, Instructor, or Administrator.
- User: shared parent class for every account
- Student
- Instructor
- Administrator
- User: name, ID, password, email, phone number, role, and address
- Student: enrolled courses and credit limit
- User information uses getters, setters, and validation
- Course: name, code, instructor, schedule, capacity, description, and enrollment status
- ExamType: grades and exam type
- Course and ExamType use getters, setters, and validation
- Log in and log out
- View available and enrolled courses
- Enroll in or drop courses
- View grades and exam types
- Update personal information
- View the credit limit and never enroll over it
- Log in and log out
- View students enrolled in assigned courses
- Grade assignments and assign exam types
- Update permitted course information
- Log in and log out
- Manage student and instructor accounts
- Create and manage courses
- Set course capacity and student credit limits
- View enrollment statistics and generate reports
- Administrator controls course capacity and student credit limits
- Instructor is assigned to courses and assigns grades and exam types
- Student can view courses, exam types, and released grades
- Course capacity determines whether a course is full
- Each role sees and changes only what it is allowed to access
- A student cannot enroll in a full course
- A student cannot enroll beyond the credit limit
- Validation protects all important updates
Decisions you need to make
The diagram defines the system structure, but you still need to decide how important user interactions behave.
- What should each role see immediately after signing in?
- What feedback appears when enrollment succeeds?
- What happens when a course is full or the credit limit would be exceeded?
- Can a student drop a course at any time?
- Which course fields may an instructor update?
- When does an instructor-entered grade become visible to the student?
- Which fields are required when an administrator creates a course or account?
- How should validation errors be communicated?
Your workflow
- Read the University Portal requirement and inspect the complete Excalidraw diagram.
- Identify the User, Student, Instructor, Administrator, Course, and ExamType classes.
- Identify each class's attributes, methods, relationships, and validation responsibilities.
- Identify unclear interaction decisions without removing anything from the diagram.
- Create or refine the interface concept in Variant for all three roles.
- Open or create the project in Visual Studio Code.
- Install dependencies and verify that the project runs locally.
- Create or connect the project to a GitHub repository.
- Make an initial commit before major implementation begins.
- Choose one small University Portal feature to implement first.
- Write down its expected behavior and relevant constraints.
- Use Codex or Claude Code to assist with implementation.
- Review every generated change and confirm it matches the diagram.
- Run the application and test the implemented behavior.
- Investigate and debug anything that does not work.
- Verify the feature, then commit the working checkpoint.
You are done when...
- You preserved all six classes from the diagram
- You can explain what each role is allowed to see and do
- You can explain the Course and ExamType relationships
- You identified at least one unclear interaction decision
- You have an interface design covering Student, Instructor, and Administrator
- Your project runs locally and is connected to GitHub
- You have at least one meaningful Git commit
- You used Codex or Claude Code during implementation
- You reviewed and tested the generated changes yourself
- You committed a verified working checkpoint
## Troubleshooting
Something going wrong is part of development. Start with evidence.
"The AI changed a lot of files and I don't know what happened."
"I gave AI a large task and now I cannot tell which part is broken."
"My application will not run locally."
"The page loads, but the feature does not work."
"The AI says it fixed the bug, but it is still broken."
"Git says I have changes and I don't know whether I should commit them."
## Self-Check Before You Leave
If you cannot complete one of these, ask an instructor before the workshop ends.
- I can turn a requirement into users, features, actions, and data
- I can identify unclear requirements before coding
- I created a functional application diagram
- I created an initial interface design
- I can run my project locally
- My project exists in a GitHub repository
- I created at least one meaningful Git commit
- I used Codex or Claude Code to implement or modify functionality
- I reviewed what the AI changed
- I tested the implementation myself
- I know where to begin investigating when something does not work
## Resources
Use official documentation when you need to go beyond what we covered in the workshop.